Scheduling Checklists
Sometimes you have checklists that you need to be completed on a certain frequency, for example an inspection that needs to be performed every week.
Our platform lets you automate this with checklist schedules.
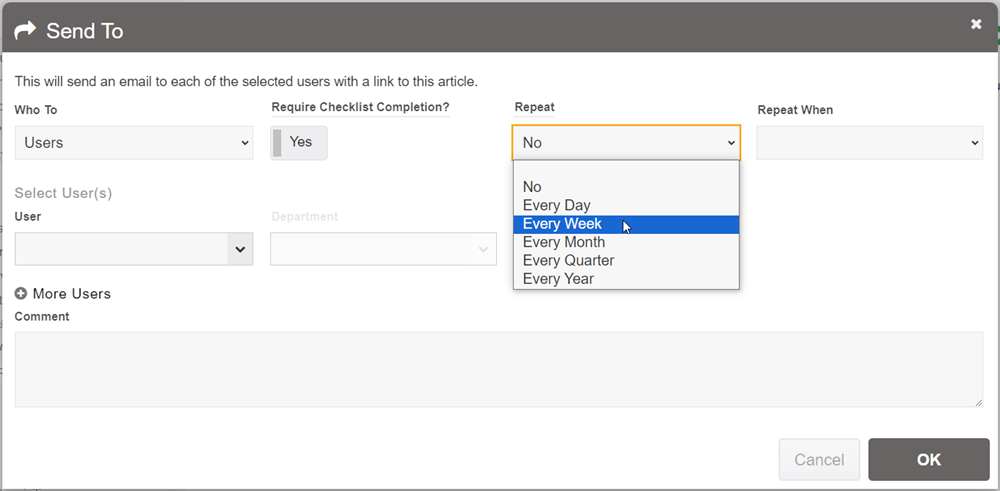
The easiest way to set up a checklist schedule is to go to an article that has a checklist. Then go to the action menu and select "Send To...". In that form you can select "Require Checklist Completion". This starts the checklist on their behalf and assigns it to them, so they then have to complete it. 
Next, select an option in the "Repeat" setting. This is the frequency that the checklist will automatically be started for the selected user(s). Then you can select in the Repeat When setting whether it should wait until the checklist is complete before scheduling the next one, or schedule it the day it scheduled the previous one.
To explain the Repeat When: If you choose When Scheduled, and you choose Every Week, and say it was done on a Wednesday - that means that the next one will be scheduled on a Wednesday also. However, if you choose When Complete, then it will wait until the checklist to be complete before scheduling the next week. So if you take 1 day to complete the checklist, the next one will be scheduled for the Thursday on the next week.
Once this form is submitted, it will automatically create an entry in the Checklist Schedule area under the article. You can access this from any article that has a checklist, by going to Explore (at the bottom of the article) and selecting "Checklist Schedules" in the tabs underneath it. 
Here you can create new schedule entries manually - using the "+" link on the right hand side. You can also delete them by hovering your cursor over the row, clicking the dropdown arrow at the end, and selecting "Delete" from there. 
